


Project Breakdown: All Well Box Top v.1 and v.2
spoiler alert: I really like this pattern. also, this is going to be long

Last week I laid out my plans to make a few things before Me-Made May starts, and I’m pleased to report that I’ve already sewn one of the items I mentioned in that post. The cream-and-gray check box top is now very-nearly finished and I’ve worn it twice since I stitched the buttons on Thursday - I made 6 buttonholes and only had 5 of my lovely lilac buttons, so until the additional one I ordered arrives, the shirt is not quite done - but more on that later.
In the past month I’ve made two All Well Box Tops, and I have another one planned to sew before summer, so it’s safe to say I’m pleased with the pattern. There are tons of box top patterns available, but I think this one is the best I’ve seen. Some of the things I considered when deciding to purchase the pattern:
It comes with a sleeve. Most of the other box top patterns I’ve come across are sleeveless, though a few of them have instructions for drafting your own sleeve. Personally, if I wanted to draft something I wouldn’t be buying a pattern at all, so from the start the All Well Workshop pattern was the one that I wanted. Also, the sleeve shape and length is exactly right - it perfectly balances the boxy shape of the body.
This pattern is the best-fitting example of a basic rectangle top that I’ve found. The body seems to have been designed to have a little less ease than most box tops, and the length is just right - the shirt is overall a little shrunken for a box top, instead of hugely oversized, which I think works so much better for this style. In my Instagram research on this pattern I also saw that the shape of the shoulder seemed to suit people with wide, square shoulders (ie, me!), which is definitely not always the case for a simple pattern like this.
After noticing these two features, plus seeing Amy from All Well wearing her box tops almost every day and always looking so cool, I decided to take the plunge and invest in the pattern. It took me a few months to sew it up but now that I have, I can say with certainty that I was right to get this one. The fit is indeed good, the sleeve is great, and you can basically modify the pattern as much as you want.
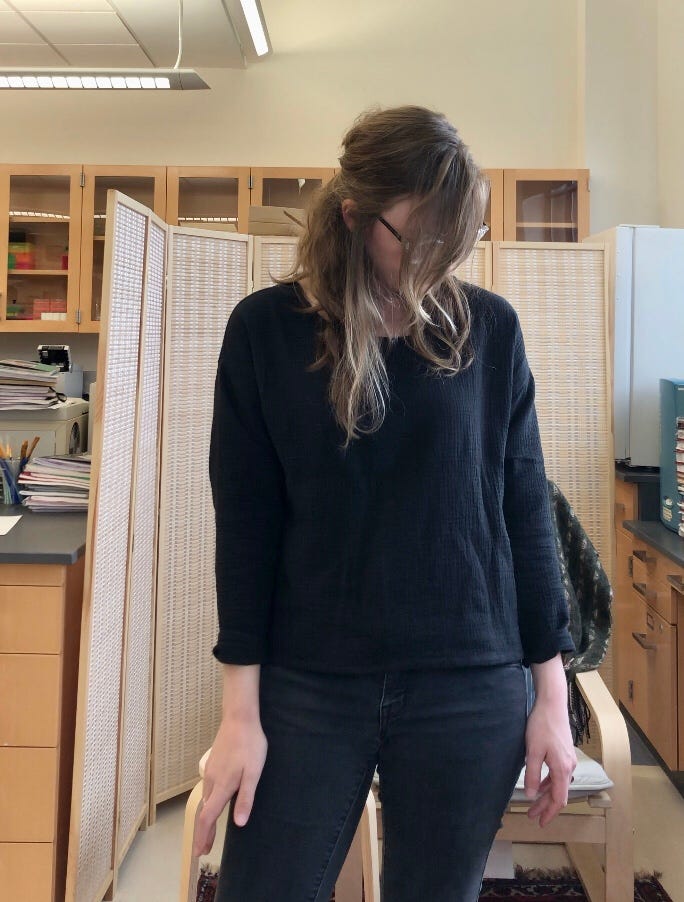
The first box top I sewed, which everyone has already seen, was made almost exactly to the pattern specs in a black double gauze remnant - I think it was 1.1 meters long, and around 60” wide. (The only change I made was to crop the body by about an inch, and this was because of the way I laid the pattern out and the slight limitation of my fabric length.) The resulting shirt is SO comfy and cozy, and is already a wardrobe staple.
The one thing I was worried about with this pattern was how the shoulder would feel. Often in a boxy top like this, if the shoulder is not wide enough, the whole piece slips towards the back when you wear it, and you end up getting choked by the front neckline. I made a size 2 because that’s how I measured on the size chart, but there wasn’t a lot of information about the sizing on the shoulder and I did feel a little apprehensive when I wore the finished garment for the first time.
I am pleased to say that I have no issues with the shoulder fit. The shoulder seam does sit about an inch ‘behind’ the top of my actual shoulder, but this seems to be a design choice and the shirt doesn’t slip back at all when I wear it. To be honest, it feels like wearing a slightly oversized, long-sleeved men’s t-shirt, which was exactly what I was hoping for.
The one slight fit problem I have is with the sleeve, which really is very slim, especially towards the bottom. What I’ve been doing is widening the lower sleeve slightly by sewing the bottom half of the sleeve seam with a 1/4” seam allowance, though I might actually add a little bit of width (no more than 3/4”) to my pattern pieces. The sleeve width is something that is mentioned in the pattern instructions, though they recommend verifying the circumference of the bicep. I don’t have a problem with the upper arm, it’s really the lower sleeve that is a tiny bit too tight, so I would say keep an eye on that if you are sewing this pattern for the first time.
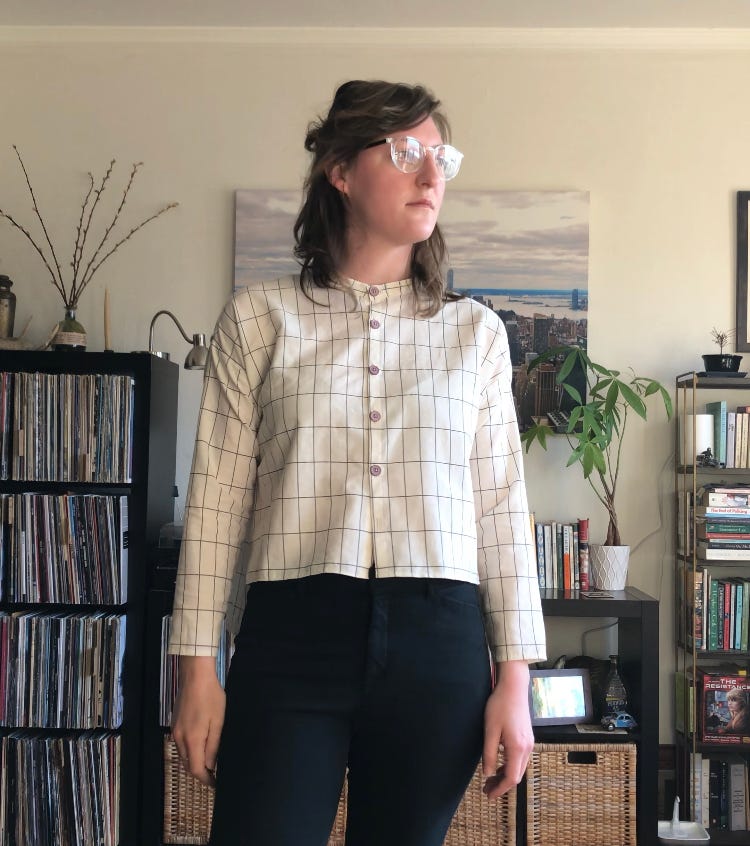
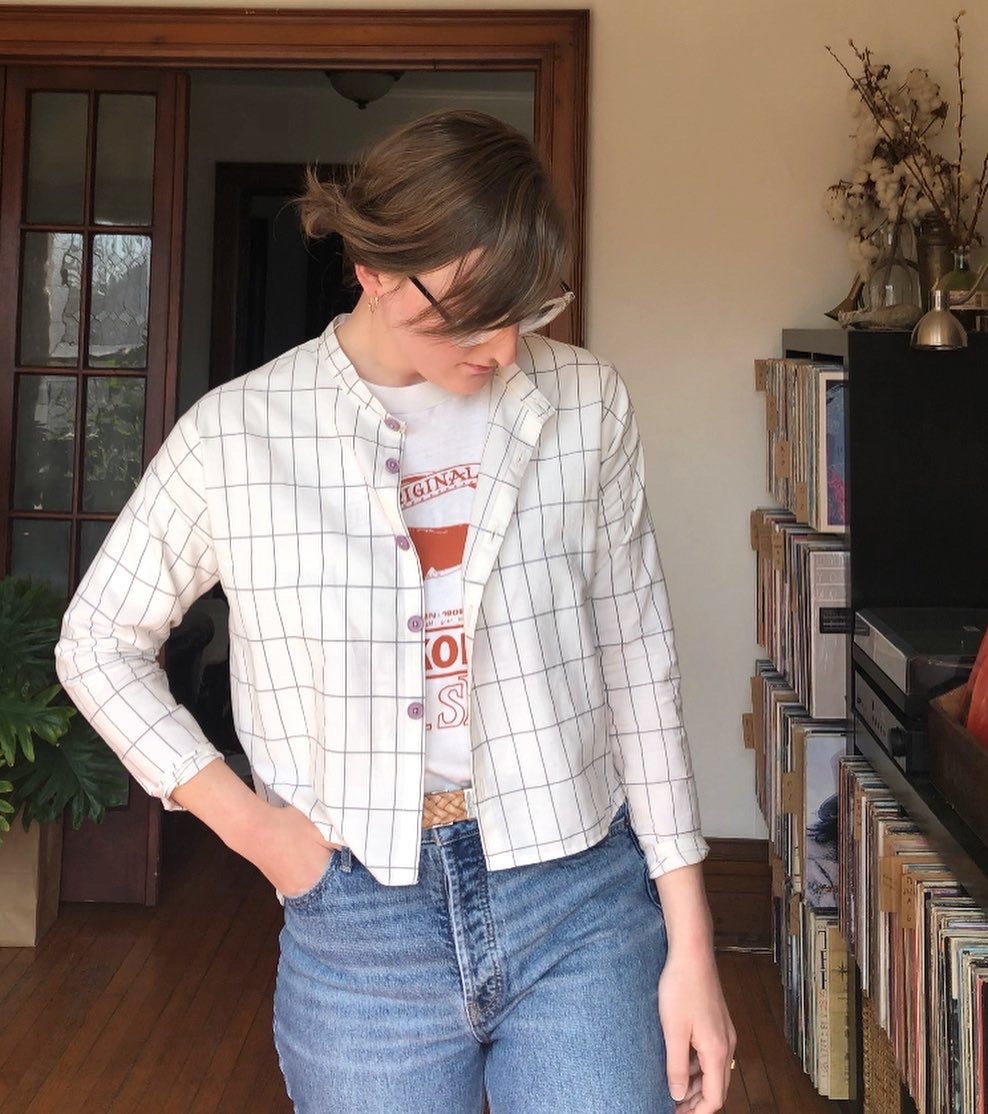
After the success of my first version, I quickly cut out another - my checked button-up version. The fabric is a thrifted cotton flat sheet, and I used the Box Top Button-up Hack tutorial from the All Well Workshop Website. This is really just a simple walk-through of how to make a few changes to the base Box Top pattern, such as adding button bands, widening the sleeve, and drafting a little stand-up collar. I ended up using the original slim sleeve, and I cut my front bodice pieces at the ‘cropped’ cutting line, while leaving the back pieces at the regular length. I did follow Amy’s instructions for the collar and button bands. The result is, in my opinion, a very sharp little shirt and I think I will get a lot of wear out of it. It works as a basic button-up and as an overshirt, and the contrasting purple buttons (bought on a whim at Merchant & Mills’ Rye shop over Christmas) are the perfect little oddball detail on an otherwise basic top. I think it looks like something you might buy at Muji, which is exactly what I was going for.
The simplicity of this garment was what appealed to me, as I’m really drawn to simple shapes and basics - they are what I most like to wear and, therefore, what I like to sew. I know a lot of people out there may not be interested in wearing what is, essentially, a couple of squares stitched together, but I’ve always enjoyed a slightly-monastic vibe in my clothes. This top is so quick and satisfying to make, and it uses very little fabric if you Tetris the pattern pieces a little bit. (I will say I think the yardage estimates from the designers are quite a bit over what is actually required.) Because of how simple it is, this pattern is definitely very accessible to beginner sewists as well.
The next one I have planned will be in a blue-and-black gingham fabric that I’ve had in my stash for a very long time. This one will be a button-up as well, though I think I’m going to use this The Fabric Store tutorial to draft a granddad collar, and I might do something different with the sleeves, just for the sake of variety. Eventually I might make a short-sleeved version for summer, too. The possibilities really are endless with this pattern, and I look forward to sewing it many more times.

Thanks for reading this bonus edition of the newsletter, and I hope this information was useful if you’re interested in making this pattern. I’ll be back next week with regularly scheduled programming. Talk to you soon!
